
10 Essential Tips for Night Photography
written by Scott Kranz | Photography, How-To
Few areas of photography are more exciting to learn than night photography. Here are ten essential tips to get you started.
1. Familiarize your camera. Before anything else, get to know your way around your camera and its settings. Is your go-to camera, whether it’s a mirrorless, DSLR, a point-and-shoot, or fancy smartphone, sufficiently powerful to shoot a night scene? Be sure you can manually adjust the “big 3” settings: shutter speed, aperture, and ISO (each addressed below).And make sure you have a suitable lens that you can manually focus. A wide-angle lens is ideal to convey the size of the sweeping night sky.
2. Bring a sturdy tripod. So you have your camera, but you’ll need more in your astro kit. What you need is some form of stabilization. Generally speaking, that means a sturdy tripod. While it’s safe to handhold an exposure of, say, 1/50th of a second or faster, the exposure time of a night shot can be upwards of 10, 20, even 30 seconds in duration. And uninterrupted stillness is needed. That said, bring a tripod that is rock solid in light of the weight of your camera and lens and given any environmental factors, such as wind.
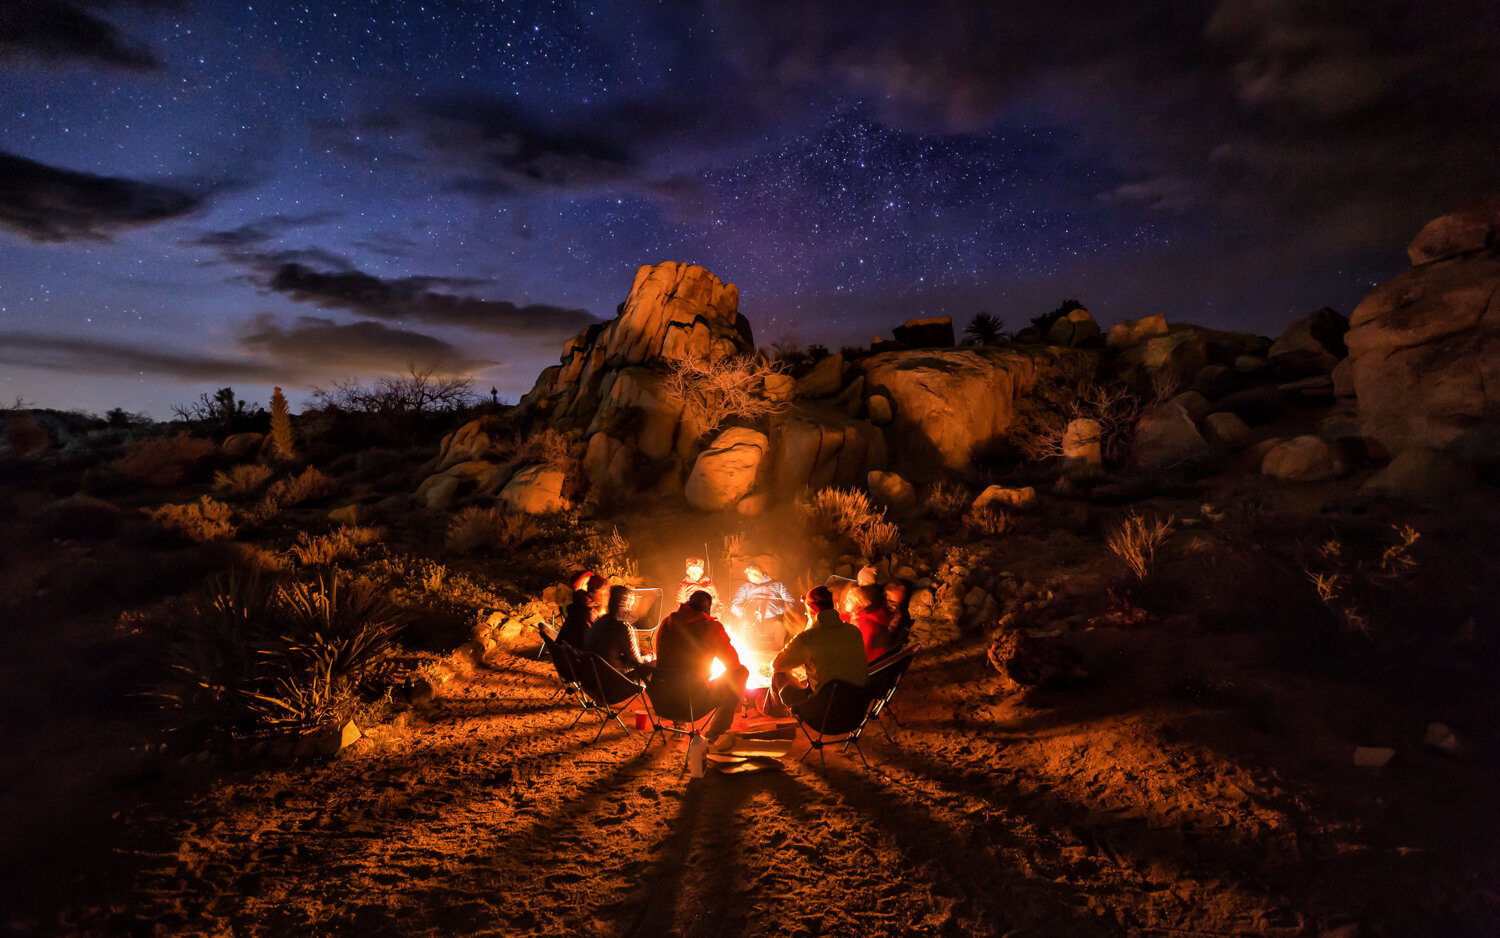
3. Select your location. To capture a night scene, you’ll ideally want to find a spot away from light pollution. Take a drive or hike into a natural area, ideally a wilderness, where the countless stars in the sky are more visible. Also, check the weather forecast to anticipate visibility — you’ll want mostly or fully clear skies.
4. Focus on infinity. Once you select your location, arrive at the scene with your trusted camera and tripod in hand, and frame your shot, it’s time to turn to your camera itself. First, you’ll want to set your focus to manual (as opposed to autofocus) and you’ll want to focus “on infinity.” Often lenses have an infinity marking (the symbol ∞) to dial to; however, take that with a grain of salt, it may not be exactly right. After you take a photo, review it and zoom in on one of the brighter stars — if it’s not tack sharp, adjust your manual dial slightly, and reshoot. This is essentially trial and error, but once you find your infinity focus the first time, it’s easy to set it with exactness thereafter.
5. Slow down your shutter speed. To create a photograph of a night sky and stars, your shutter speed needs to be much longer than daytime shots. As noted above, it’s not uncommon for a night shot to be 10, 20, or even 30 seconds in duration. For starters, if there is very little light (not even light pollution or moonlight), start with a 20 to 30 second shot. One caveat to be aware of: if your lens’ focal length is not ultra wide (i.e., if it’s greater than, say, 24mm), you may see star “trails” as a result of longer exposure, such as 25, 30, or 30+ seconds in duration. These trails are the result of the earth’s rotation, however slight. That said, if you want tack sharp stars, go with a wider focal length (12mm to 24mm, generally speaking) with exposures up to 30 seconds in duration, otherwise opt for a shorter exposure length.
6. Open your aperture. One of your camera’s main settings is its aperture (the “f/number”). Aperture is the size of the shutter’s opening. For a night shot, you’ll generally want a wider aperture, which is the smaller “f/number,” often f/2.8 or lower. Using a wide aperture, much like a dilated pupil, will let in more light, which is very much desired in the dark of night.
7. Bump up your ISO. The last main setting is ISO, which relates to your camera sensor’s sensitivity to light. The higher the ISO, the more light it will capture. As a rule of thumb, depending on your camera and the amount of available light, start with an ISO between 2000 to 4000. A word of warning, however, when you increase your ISO you will introduce more noise in your image. That said, increase your ISO only as much as needed to properly expose the night sky.
8. Avoid any camera shake. After you manually focus to infinity and set your shutter speed, aperture, and ISO, double check that your camera is securely mounted to your tripod. If you need extra stabilization and your tripod has a hook located beneath its center column, you can always hang a pack or sandbag from it. Additionally, because the act of pressing down the shutter can cause microscopic camera shake, be sure to use a two-second delay self timer.
9. Repeat and perfect. After you capture an initial shot, review it and double check everything. Is your focus correctly set to infinity? If not, manual adjust your focus accordingly. Is your image too dark? If so, you have three options with respect to your settings: lengthen your shutter speed, open up your aperture further, or increase your ISO. Is your image too bright (a less common problem, but a possible one), you again have three options: shorten your shutter speed, close your aperture slightly, or decrease your ISO. Especially at the beginning as you learn this new skillset, consider trail and error your friend. It’s a vital process through which you perfect the craft!
10. Get creative and keep it fun. Once you successfully create a well-composed, well-exposed, and well-focused night shot, your next step is to experiment with your creativity. For example, try using artificial light, such as a headlamp or lantern, in the foreground. To diffuse the light, place a white cloth (such as a shirt or a bandana) over it if necessary. But, above all, be sure to keep it fun!
Join for More (It's Free):
Sign up for my monthly(ish) newsletter where I share field notes, photography tips, outdoor inspiration, early access, and free downloads (like phone wallpapers and photo guides), sent directly to your inbox.
ABOUT THE AUTHOR

Scott Kranz is a full-time outdoor photographer and filmmaker based in Seattle. Born and raised in Minnesota, Scott moved to Washington State in 2013 and first explored the Cascade Range, which sparked a lifelong love of outdoor adventure and photography. Since, he’s come to partner with some of the world’s leading brands and shot on all seven continents.